Custom Fields
Custom fields add structured data to cards. A standalone board has its own field catalogue. Every board in a workspace uses the workspace's shared catalogue.
Use custom fields for information your team wants to show on cards, filter by, group by, sort, export, summarize, or report on. Shared workspace fields are one of the main reasons Table, Global Work, and Portfolio can compare related boards consistently. Standalone fields keep one board independent.
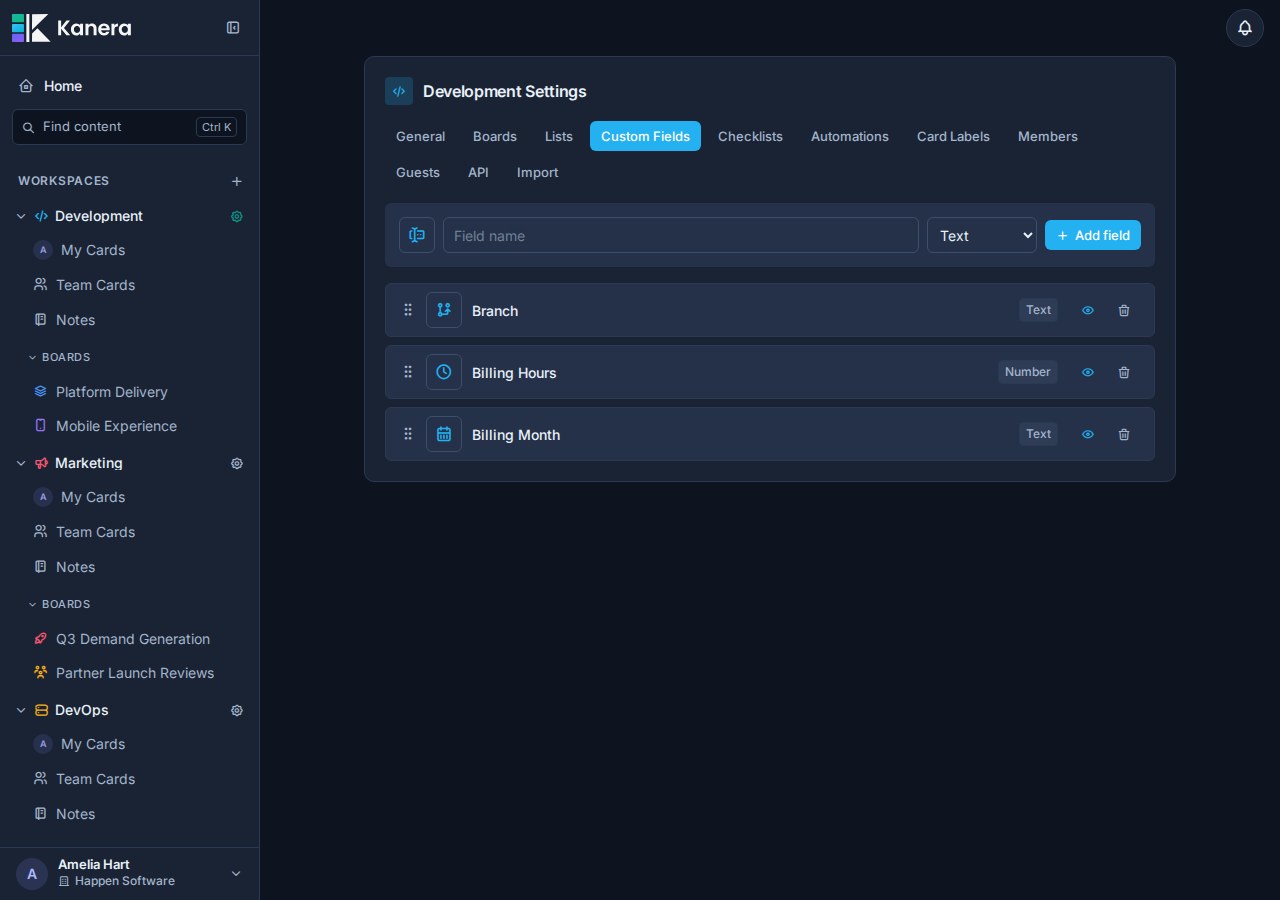
Open custom field settings
- Open the workspace or standalone board.
- Go to Workspace settings or Board settings.
- Choose Custom Fields.
The page shows a field creation row at the top and the current board or workspace fields below it.
If the workspace has no fields yet, Kanera shows No custom fields yet.
Who can manage custom fields
Custom field setup is board or workspace administration.
Workspace admins and owners can create, rename, reorder, configure, and delete custom fields. People with edit access to cards can set field values on cards they can edit.
Add a field
Use the field creation row to add a workspace field.
- Pick an icon.
- Enter the field name.
- Choose a field type.
- If the type supports it, choose whether the field allows multiple values.
- Click Add field.
Custom field names must be unique within a workspace. Kanera checks names case-insensitively so fields such as Priority and priority are treated as duplicates.
Choose the field type carefully. A field's type is fixed after creation. You can rename the field, change its icon, reorder it, change visibility, and update supported multi-value behavior, but you do not change a Text field into a Select field later.
Field types
Kanera supports these custom field types:

| Type | Stored value | Use |
|---|---|---|
| Text | Free text | Branch names, reference codes, client names, campaign names, or short notes. |
| Number | Numeric value | Hours, estimates, scores, budgets, quantities, effort, or other measurable values. |
| Checkbox | Yes/no value | Simple flags such as Blocked, Approved, Billable, or Needs Review. |
| Select | One or more controlled options | Priority, risk, platform, department, severity, type, or status-like metadata. |
| Date | Local date | Launch dates, SLA dates, target releases, review dates, or renewal dates. |
| URL | Web link | Pull requests, designs, documents, tickets, assets, or external references. |
| User | One or more workspace members | Reviewer, product owner, account owner, escalation contact, or stakeholder. |
Select and User fields can allow either one value or multiple values. Other field types store one value.
Manage existing fields
Each field appears as a draggable row. From that row, you can:
- Drag the field to change its order.
- Change the field icon.
- Click the field name to rename it.
- Toggle multiple values for Select and User fields.
- Toggle whether the field is shown on card fronts.
- Delete the field.
Field order affects how fields appear elsewhere in Kanera, including card details, card fronts, Table columns, exports, and grouping controls.
Show or hide fields on cards
The eye button controls whether a field is shown on card fronts.
- Eye on: the field is visible on card fronts when the card has a value.
- Eye off: the field is hidden from card fronts, but still available in card details and views.
New fields are shown on card fronts by default.
Show fields that help people scan a board quickly, such as Priority, Due Date, Client, Severity, or Effort.
Hide fields that are useful but too detailed for the board surface, such as internal reference links or reporting-only metadata.
Select field options
Select fields have an option editor directly inside the field row.
For each option, you can:
- Rename the option.
- Change its color.
- Delete the option.
- Drag options into a different order.
You can also add a new option from the option row at the bottom of the field.
Option order controls how choices appear when someone sets that field on a card, and how select-field groups are ordered in Table view.
Deleting an option removes it from the active option list. Kanera keeps enough history for existing card values and activity to continue resolving the old option label where needed.
Multiple values
Only Select and User fields support multiple values.
Use multiple values when more than one answer can be true:
| Field | Multiple values help when |
|---|---|
| Platform | A card affects Web, iOS, and Android. |
| Reviewer | Several people need to review the same card. |
| Department | Work crosses multiple teams. |
| Stakeholders | More than one workspace member needs to be connected to the card. |
Keep fields single-value when the card should have one clear answer, such as Priority, Severity, Owner, or Risk.
Switching a Select or User field from multiple values to single value affects future edits and picker behavior. Existing card values are not rewritten in bulk, but new writes are validated as single-value.
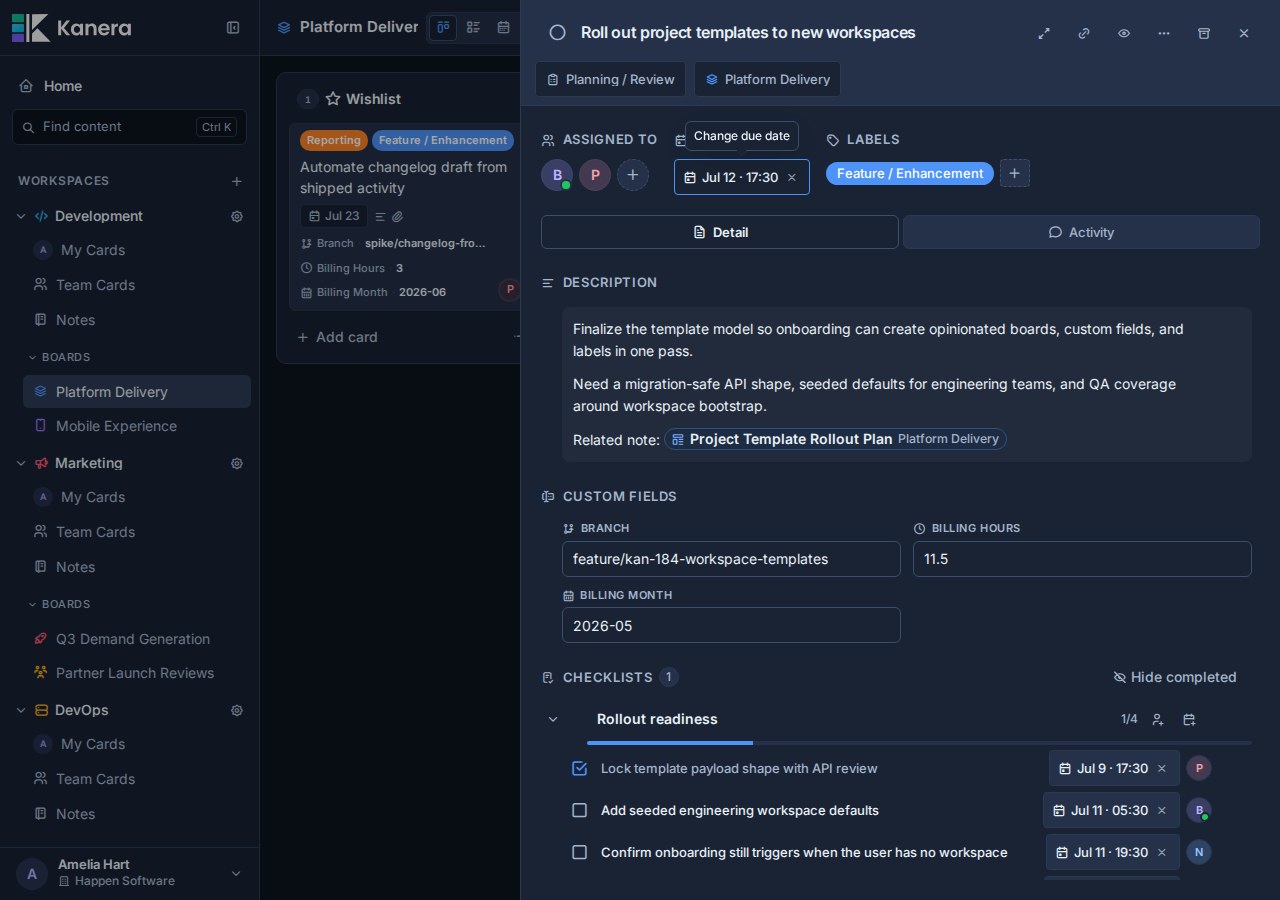
Using fields on cards
When someone sets a custom field value on a card, Kanera validates the value against the field type.
- Select values must be active options from that field.
- User values must be members of the workspace.
- Date values use a local date.
- URL values must be valid URLs.
- Number values are stored as numeric values for sorting and aggregation.
Clearing a field removes that value from the card without deleting the workspace field.
Custom fields in automations
Automations can populate custom field values as part of a workflow.
For example, an automation can set Priority when a card enters Review, set Blocked Since to the current date when a Blocked label is added, check Billable for client work, or assign a Reviewer user field after checklist completion.
Automation field actions can either set a value directly or copy the value of another field of the same type on the same card, such as copying an estimate into an actuals field. They use the field's type:
- Text fields can receive fixed text or the current date formatted as a date, month, or date and time.
- Number, date, checkbox, select, and user fields receive matching typed values.
- Copy-from-field sources must be the same type as the field being set. Between two select fields, options are matched by label because each select field has its own options.
- Select options must still be active options on the field.
- User values must still be workspace members.
By default, automation field actions only fill empty fields. When the automation should own the value, you can allow it to overwrite existing values.
Custom fields in views
Custom fields are used throughout Kanera views.
In Kanban, fields marked as shown on card fronts can appear directly on cards.
In Table view, custom fields can appear as columns. You can show, hide, reorder, and resize those columns. You can also group by most custom field types.
In Global Work, the same fields help managers and teammates group, filter, and compare cards across every accessible board. Portfolio filters use those fields to narrow rollups and drill-downs.
In Work Done, label and supported custom-field filters match the event's card, which makes historical review more specific.
Number fields can be summarized in Table view with Sum and Avg aggregates. This is useful for fields such as Effort, Hours, Budget, or Score.
Aggregates can also be broken down by another dimension in Table view. For example, group by Client, sum Hours, and break down by Work Type to create an Excel-ready billing report. The export writes card rows, tidy summary rows, and a readable report sheet when aggregates are enabled. See Reporting and Excel Export.
Delete a field
Deleting a custom field permanently removes the field and all of its values from every card in the workspace.
Kanera asks for confirmation before deleting a custom field. Use this carefully, especially on fields that have been used across multiple boards.
If any automation writes to or copies from the field, Kanera removes that action and disables the affected automation so it does not keep running with a missing field. Re-enable those automations after pointing them at a valid field.
If you only want to make a field less visible, hide it from card fronts instead of deleting it.
Good field design
Create fields that will be reused across boards in the same workspace.
Good workspace-wide fields:
- Priority.
- Client.
- Effort.
- Risk.
- Severity.
- Target Release.
- Product Owner.
- Asset URL.
- SLA Date.
Avoid creating a custom field for one-off notes. Put one-off details in the card description or comments.
Avoid using custom fields as a replacement for lists. Lists should describe the workflow stage. Custom fields should describe structured metadata about the card.