First-Time Setup
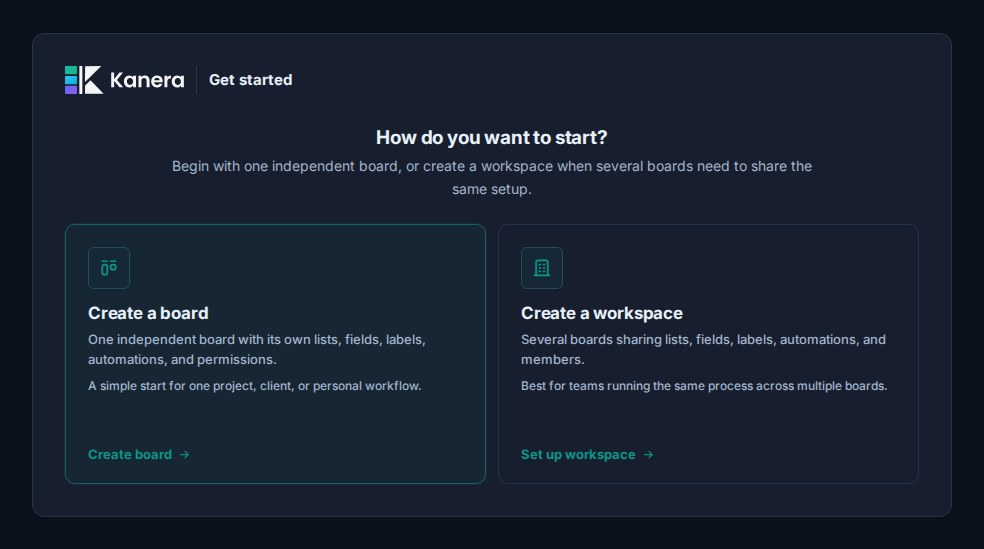
After your first sign-in, Kanera opens the onboarding wizard and asks whether you want one independent board or a workspace for several related boards.
- Choose a standalone board when its lists, labels, custom fields, automations, and access should be independent.
- Choose a workspace when several boards should share one setup and support consistent cross-board work.
When onboarding appears
Kanera sends a new account to onboarding before it has created a workspace or standalone board. After setup, organisation admins can create more standalone boards from the Boards section in the sidebar or more workspaces from the workspace menu.
Before you begin, you need:
- A Kanera account.
- Organisation-admin permission to create boards or workspaces.
- A rough idea of the work you want Kanera to organize.
Step 1: Choose a standalone board or workspace
The first screen offers two ways to start:
| Choice | Best for |
|---|---|
| Create a board | One project, client, personal workflow, or Trello-style independent board. |
| Create a workspace | Several boards that should share lists, fields, labels, automations, and members. |
You can use both models in the same organisation. Your choice is about how this work should be structured, not a permanent organisation-wide mode.
Start with a standalone board
Choose Create a board, then:
- Enter the board name.
- Choose an icon and colour if you want to customise its identity.
- Pick a starting template.
- Select Create board.
The template seeds lists, labels, and custom fields for this board only. You can change them later from Board settings without affecting any other board.
Read Standalone Boards for settings, access, imports, and the full comparison with workspaces.
Start with a workspace
Choose Create a workspace when several boards should share one operating model. Workspace setup lets you review the shared structure before entering the app.
Pick a workspace template
The first screen asks what type of work you are doing. Choose the template closest to your workflow.
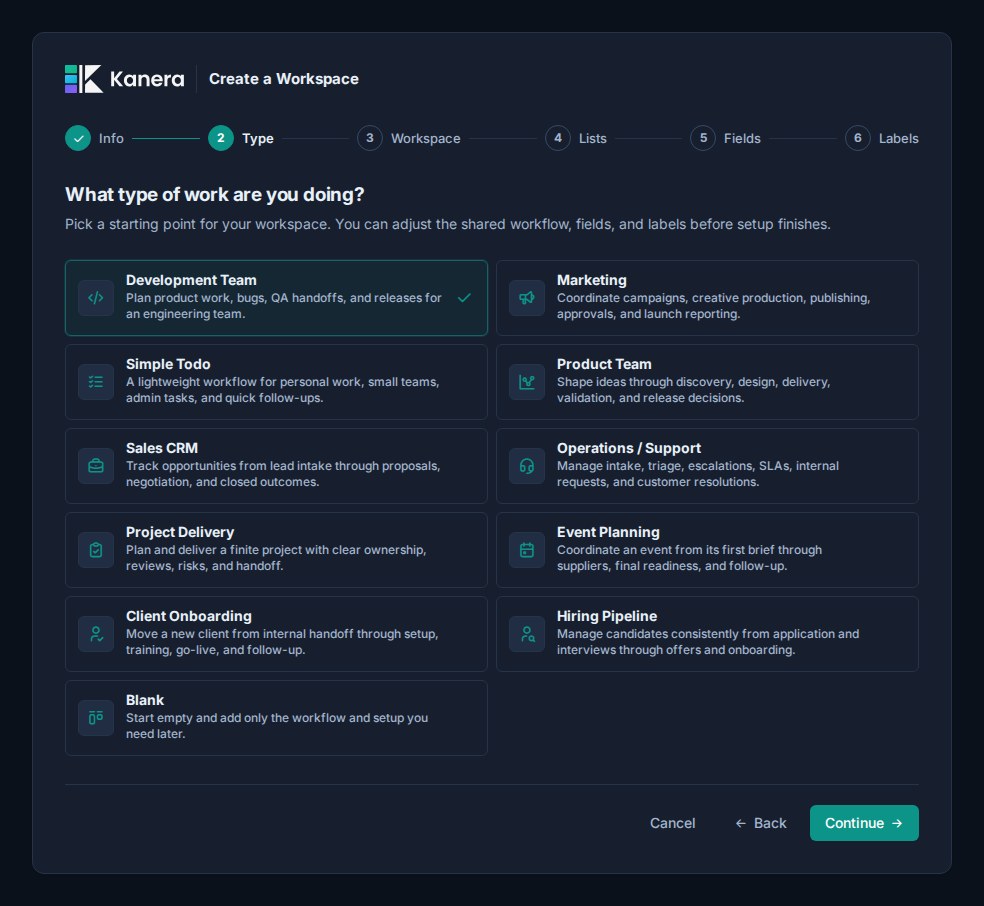
The available templates are:
| Template | Best for |
|---|---|
| Development Team | Product work, bugs, QA handoffs, and releases. |
| Marketing | Campaigns, creative production, approvals, and launches. |
| Simple Todo | Personal work, small teams, admin tasks, and quick follow-ups. |
| Product Team | Discovery, design, delivery, validation, and release decisions. |
| Sales CRM | Leads, proposals, negotiation, and closed outcomes. |
| Operations / Support | Intake, triage, escalations, SLAs, and resolutions. |
| Project Delivery | Finite projects with clear ownership, reviews, risks, and handoff. |
| Event Planning | Events that need supplier coordination, readiness checks, and follow-up. |
| Client Onboarding | Client handoffs, setup, training, go-live, and follow-up. |
| Hiring Pipeline | Candidates moving through applications, interviews, offers, and onboarding. |
| Blank | An empty workspace you can shape later from workspace settings. |
The template only gives you a starting point. You can adjust the workspace name, lists, custom fields, and labels before setup finishes. The Blank option skips the initial board and leaves lists, custom fields, and labels empty so you can configure them later.
Set up your workspace
Give the workspace a name and pick an icon.
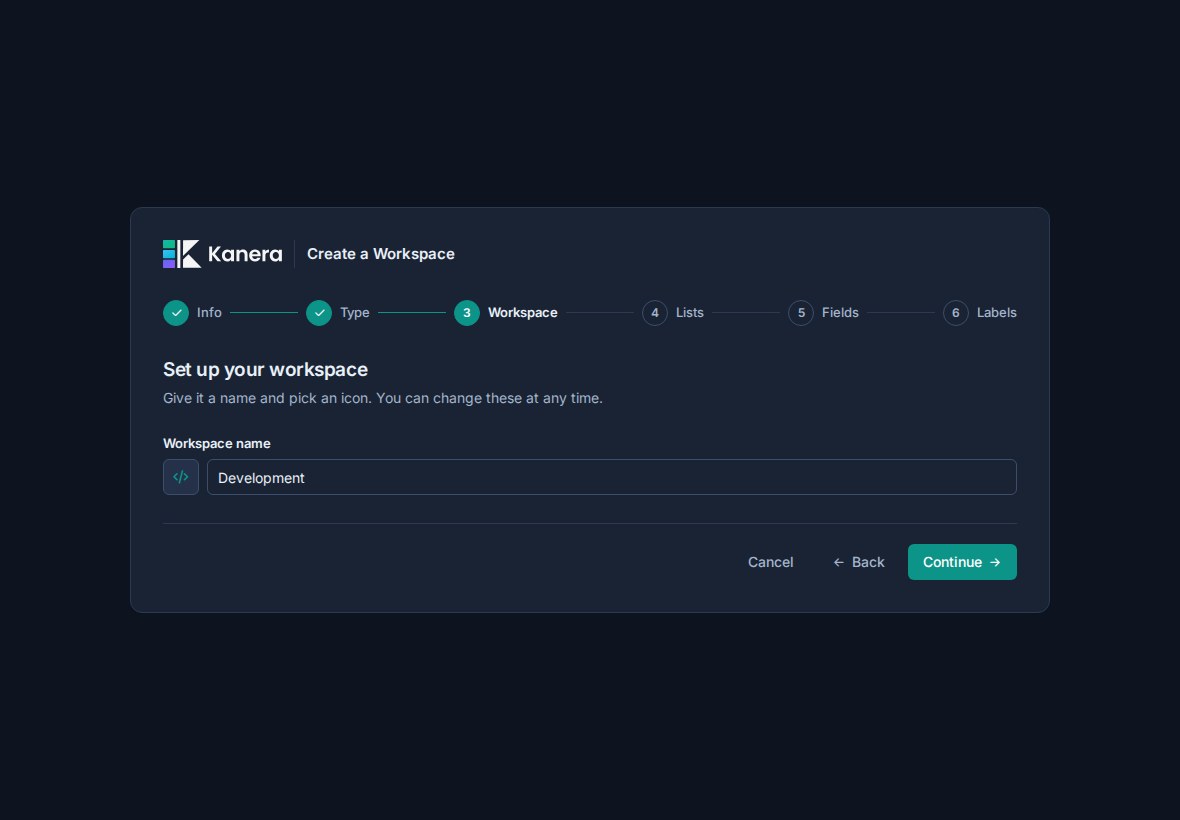
The template suggests a default name, such as Development, Marketing, or Operations. Rename it to match the team, company, client group, or operating area that will use it.
Use a workspace for work that should share the same process. For example, a development workspace might share the same lists and fields across multiple product boards.
Define lists
Next, review the lists that will become the shared workflow stages for the workspace.
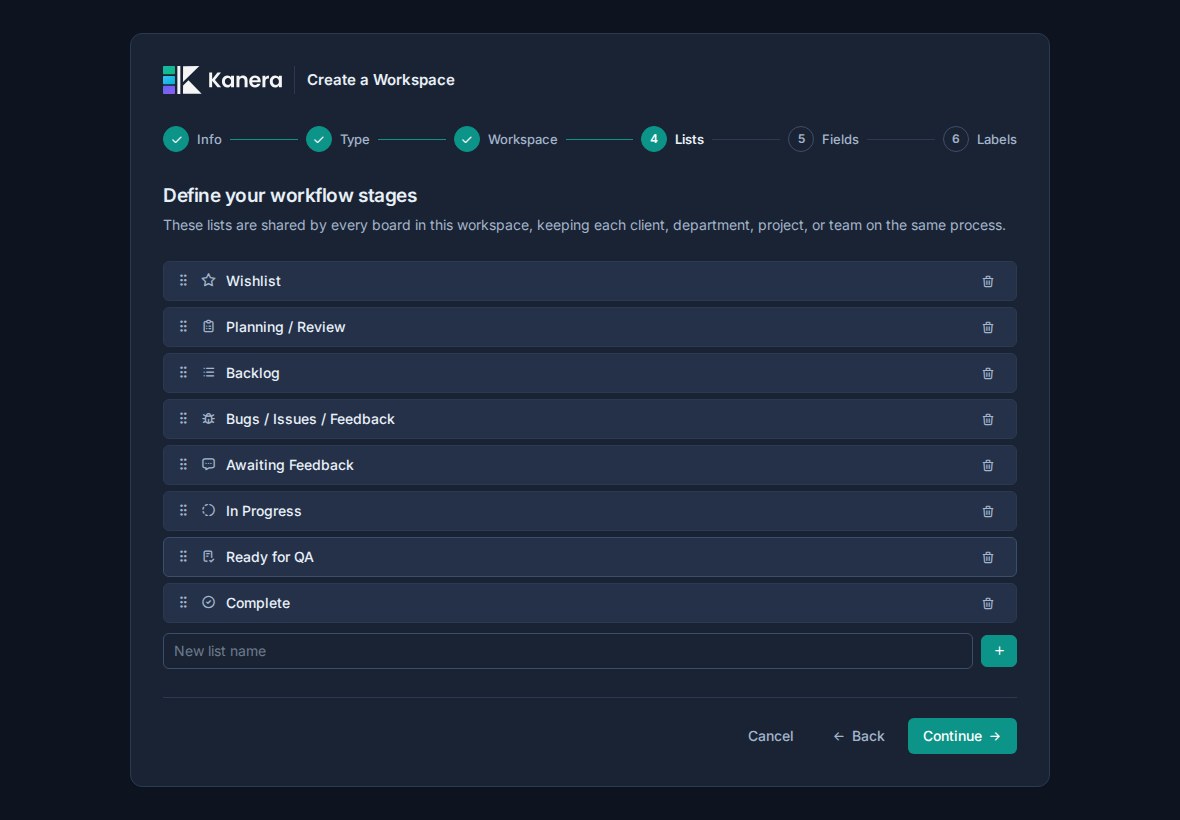
You can:
- Reorder lists.
- Remove lists you do not need.
- Add new lists.
- Rename the workflow around your team's language.
Kanera requires at least two lists before you can continue.
For example, the Development Team template starts with stages such as Wishlist, Planning / Review, Backlog, Bugs / Issues / Feedback, Awaiting Feedback, In Progress, Ready for QA, and Complete.
Keep the workflow broad enough to work across boards. If a status only applies to one board, it may be better as a label or custom field later.
Review custom fields
Custom fields are optional during onboarding, but they are one of the main ways Kanera keeps work structured across boards.
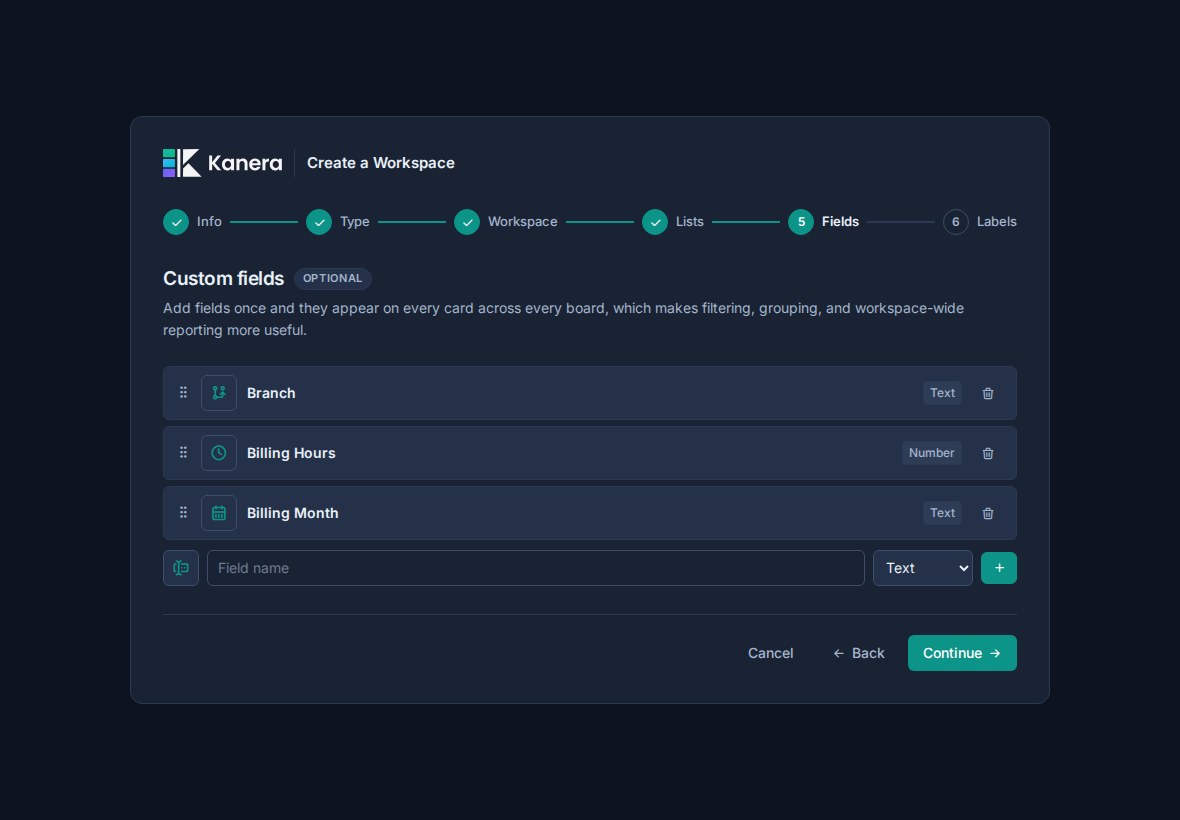
You can:
- Keep the fields from the selected template.
- Add fields.
- Remove fields.
- Reorder fields.
- Change field icons.
- Rename fields.
- Add and reorder options for select fields.
- Switch supported select and user fields between single and multiple values.
Supported field types during onboarding are:
| Type | Use |
|---|---|
| Text | Short free-form values. |
| Number | Estimates, scores, budgets, or quantities. |
| Checkbox | Yes/no flags. |
| Select | A controlled list of options. |
| Date | Due dates, launch dates, SLA dates, and review dates. |
| URL | Links to external resources. |
| User | A person connected to the card. |
Custom field names must be unique within a workspace.
Start with fields your team will actually use on many cards. You can add more later from workspace settings.
Review labels
Labels are optional too. They are shared across the workspace so categories mean the same thing wherever work lives.
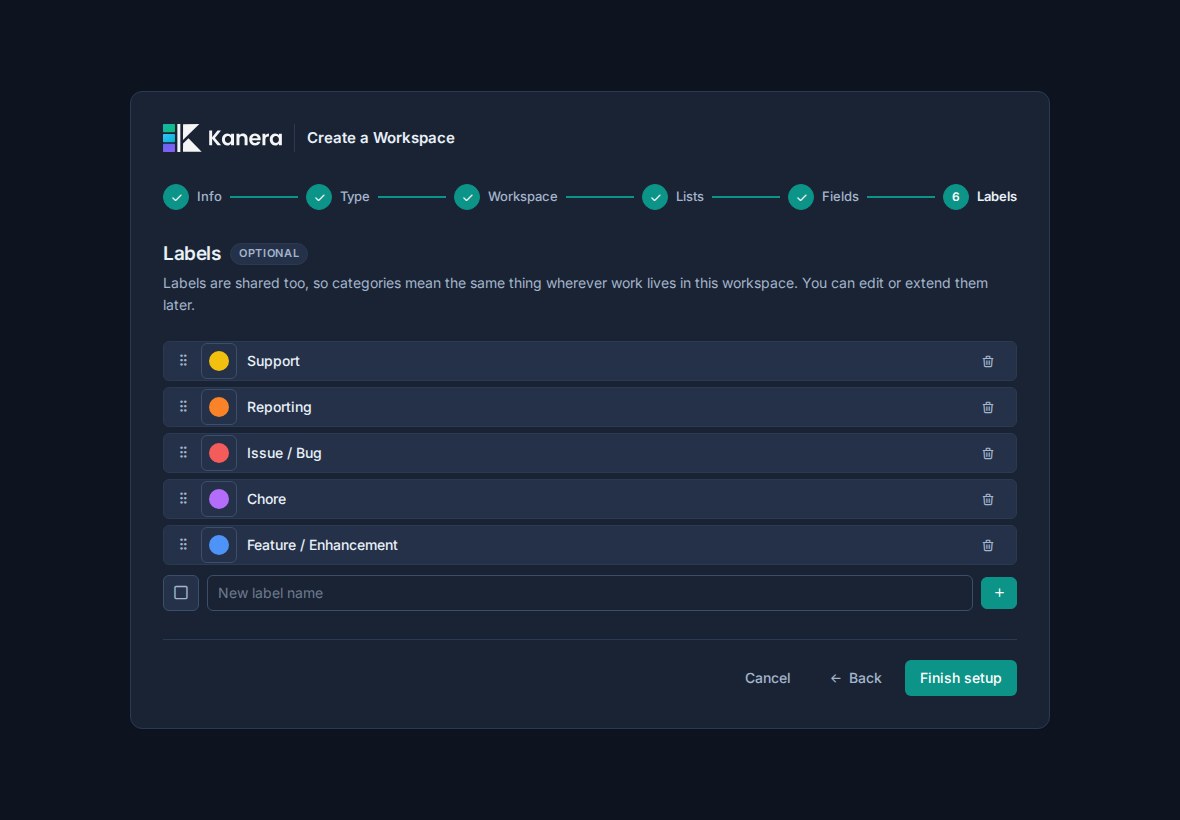
You can:
- Keep the labels from the selected template.
- Add labels.
- Remove labels.
- Reorder labels.
- Change label colors.
Use labels for lightweight categories such as Bug, Feature, Customer, Campaign, At Risk, or Follow-up.
Use custom fields when you need structured values that should be filtered, grouped, sorted, or summarized.
Finish workspace setup
When you choose Finish setup, Kanera creates the workspace with the name, icon, lists, custom fields, and labels you reviewed.
After the workspace is created, you can start using the main app:
- Create a board for an initiative, client, department, or workflow.
- Add cards to the board.
- Assign owners and due dates.
- Use the shared labels and custom fields you created during onboarding.
- Invite teammates once the workspace has enough shape to make sense.